Enablement
Table of Contents
-
What Carbon Aware SDK Provide You?
- CLI
- WebAPI
- SDK
- Use cases
-
2.1 Pre-requisites
- Data sources
- System requirement
2.2 CLI
- Setup
- Usage
2.3 WebAPI
- Setup
- Deploying with container
- Deploying with Kubernetes
- Usage
- Calling WebAPI using CLI
- Calling WebAPI using client libraries
2.4 Configurations
1. What Carbon Aware SDK Provide You?
Carbon Aware SDK helps you reduce the carbon footprint of your application by analyzing the times and locations where it is most carbon-efficient. There are several ways to consume CarbonAware data for your use case. Each approach surfaces the same data for the same call (e.g. the CLI should not give you different data than the WebAPI for the same query). We provide a number of different endpoints to provide the most flexibility to integrate to your environment:
-
CLI You can run the application using the CLI and refer to more documentation here.
-
WebAPI You can build a container containing the WebAPI and connect via REST requests and refer to more documentation here.
-
SDK You can reference the Carbon Aware C# Library in your projects and make use of its functionalities and features.
 |  |
|---|---|
| CLI | WebAPI |
Use cases
CarbonAwareSDK has been embraced by the industry leaders across the globe. Here we show some examples of the use case.
2. How to use Carbon Aware SDK?
2.1 Pre-requisites
Data sources
We support various data sources of carbon aware data:
- WattTime
- ElectricityMaps
- JSON file
There are a few constraints to select data sources to some functions of CarbonAwareSDK. You can also visit the Selecting a Data Source guide for further information on data sources options, and Data Sources for detailed architecture decisions around integrating different data providers into the carbon aware SDK.
System requirement
- Command Line Interface (CLI)
- .NET 8.0
- Alternatively:
- Docker
- VSCode and its Remote Containers extension
- WebAPI
- Docker
- VSCode and its Remote Containers extension
2.2 CLI
Set up
The CLI can either be run locally with .NET or in a container, e.g. using
VSCode Remote Containers (Dev Container). To run locally:
-
Clone CarbonAwareSDK to your environment:
git clone https://github.com/Green-Software-Foundation/carbon-aware-sdk.git -
Change directory to:
cd carbon-aware-sdk/src/CarbonAware.CLI/src -
If you have a WattTime account registered (or other data source) - you will need to configure the application to use them. By default the SDK will use a pre-generated JSON file with random data. This random data is meant to make it easier to get started with the SDK and doesn't represent actual Carbon data. To configure the application, you will need to set up specific environment variables or modify
appsettings.jsoninside ofsrc/CarbonAware.WebApi/srcdirectory. Detailed information on configuration can be found in the overview.md file.Otherwise, you can follow an example configuration below (export these environment variables in the Terminal):
export DataSources__EmissionsDataSource="WattTime"
export DataSources__ForecastDataSource="WattTime"
export DataSources__Configurations__WattTime__Type="WattTime"
export DataSources__Configurations__WattTime__username="<YOUR_WATTTIME_USERNAME>"
export DataSources__Configurations__WattTime__password="<YOUR_WATTTIME_PASSWORD>"
or
export DataSources__EmissionsDataSource="ElectricityMaps"
export DataSources__ForecastDataSource="ElectricityMaps"
export DataSources__Configurations__ElectricityMaps__Type="ElectricityMaps"
export DataSources__Configurations__ElectricityMaps__APITokenHeader="auth-token"
export DataSources__Configurations__ElectricityMaps__APIToken="<YOUR_ELECTRICITYMAPS_TOKEN>" -
Run the CLI using
dotnet run
The CLI will ask you to at minimum provide a --location (-l) parameter.
Usage
Calling the SDK via CLI
To run the CLI, simply call dotnet run and provide it with any parameters. If
you fail to pass any parameters, a help screen will be printed out with possible
parameters and short explanations.
To get a list of all locations supported, you can use the Locations API,
referenced in src/CarbonAware.CLI/src/Commands/Location
and the command .\caw locations.
Note that you have to configure LocationDataSourcesConfiguration
into appsettings.json before running the command.
Expected output:
{
  "eastus": {
    "Latitude": 37.3719,
    "Longitude": -79.8164,
    "Name": "eastus"
  },
  ...
  "switzerlandnorth":{
    "Latitude": 47.451542,
    "Longitude": 8.564572,
    "Name": "switzerlandnorth"
  },
  ...
}
For example, to get emissions in the eastus and uksouth region between
2022-08-23 at 11:15am and 2022-08-23 at 11:20am, run:
dotnet run emissions -l eastus,uksouth -s 2022-08-23T11:15 -e 2022-08-23T11:20
Expected output:
[
  {
    "Location": "PJM_ROANOKE",
    "Time": "2022-08-23T11:20:00+00:00",
    "Rating": 567.44405487,
    "Duration": "00:05:00"
  },
  {
    "Location": "PJM_ROANOKE",
    "Time": "2022-08-23T11:15:00+00:00",
    "Rating": 564.72250065,
    "Duration": "00:05:00"
  },
  {
    "Location": "UK",
    "Time": "2022-08-23T11:20:00+00:00",
    "Rating": 422.74808884000004,
    "Duration": "00:05:00"
  },
  {
    "Location": "UK",
    "Time": "2022-08-23T11:15:00+00:00",
    "Rating": 422.74808884000004,
    "Duration": "00:05:00"
  },
]
To get the best time and location from a list of locations and a specified time
window, use the --best flag. E.g. to get the best time and location in a 24
hour window on the 23rd of August in the regions: eastus, westus,
westus3,uksouth, run the command:
dotnet run -l eastus,westus,westus3,uksouth -s 2022-08-23T00:00 -e 2022-08-23T23:59 --best
Expected output:
[
  {
    "Location": "UK",
    "Time": "2022-08-23T08:50:00+00:00",
    "Rating": 384.64632976,
    "Duration": "00:05:00"
  }
]
2.3 WebAPI
Setup
Deploying with Container
First we need to set up the GitHub repository https://github.com/Green-Software-Foundation/carbon-aware-sdk.git:
-
git clone https://github.com/Green-Software-Foundation/carbon-aware-sdk.git -
Change directory into the repository:
cd carbon-aware-sdk -
Open VSCode:
code . -
Open VSCode Command Palette: (Linux/Windows:
ctrl + shift + P, MacOS:cmd + shift + P), and run the command:Remote-Containers: Open Folder in Container
-
If you have a WattTime account registered (or other data source) - you will need to configure the application to use them. By default the SDK will use a pre-generated JSON file with random data. To configure the application, you will need to set up specific environment variables or modify
appsettings.jsoninside ofsrc/CarbonAware.WebApi/srcdirectory. Detailed information on configuration can be found in the overview.md file.Otherwise, you can follow an example configuration below (export these environment variables in the Terminal):
export DataSources__EmissionsDataSource="WattTime"
export DataSources__ForecastDataSource="WattTime"
export DataSources__Configurations__WattTime__Type="WattTime"
export DataSources__Configurations__WattTime__username="<YOUR_WATTTIME_USERNAME>"
export DataSources__Configurations__WattTime__password="<YOUR_WATTTIME_PASSWORD>"
or
export DataSources__EmissionsDataSource="ElectricityMaps"
export DataSources__ForecastDataSource="ElectricityMaps"
export DataSources__Configurations__ElectricityMaps__Type="ElectricityMaps"
export DataSources__Configurations__ElectricityMaps__APITokenHeader="auth-token"
export DataSources__Configurations__ElectricityMaps__APIToken="<YOUR_ELECTRICITYMAPS_TOKEN>" -
In the VSCode Terminal:
-
Change directory to:
cd src/CarbonAware.WebApi/src -
And run the application using:
dotnet run -
By default, it will be hosted on
localhost:5073
Deploy Web API on Kubernetes with Helm
You can deploy Web API as a Kubernetes application via Helm. GSF provides a chart as an OCI container, so you have to use Helm v3.8.0 or later.
Following command creates carbon-aware-sdk namespace and deploys Web API into
it with specified values.yaml.
helm install casdk -n carbon-aware-sdk --create-namespace oci://ghcr.io/green-software-foundation/charts/carbon-aware-sdk --values values.yaml
values.yaml should contain appsettings.json which would be used in Web API
at least. It should include data source definitions and their credentials. It
would be stored as Secret resource.
appsettings: |-
  {
    "DataSources": {
      "EmissionsDataSource": "WattTime",
      "ForecastDataSource": "WattTime",
      "Configurations": {
        "WattTime": {
          "Type": "WattTime",
          "Username": "username",
          "Password": "password",
          "BaseURL": "https://api2.watttime.org/v2/"
        }
      }
    }
  }
Also you can include following configuration into values.yaml.
# Number of replicas
replicaCount: 1

image:
  repository: ghcr.io/green-software-foundation/carbon-aware-sdk
  pullPolicy: IfNotPresent
  # You can set specified tag (equivalent with the SDK version in here)
  tag: latest

# Set the value if you want to override the name.
nameOverride: ""
fullnameOverride: ""

serviceAccount:
  # Specifies whether a service account should be created
  create: true
  # Annotations to add to the service account
  annotations: {}
  # The name of the service account to use.
  # If not set and create is true, a name is generated using the fullname template
  name: ""

podAnnotations: {}

podSecurityContext: {}
  # fsGroup: 2000

securityContext: {}
  # capabilities:
  #   drop:
  #   - ALL
  # readOnlyRootFilesystem: true
  # runAsNonRoot: true
  # runAsUser: 1000

service:
  type: ClusterIP
  port: 80

ingress:
  enabled: false
  className: ""
  annotations: {}
  hosts:
    - host: carbon-aware-sdk.local
      paths:
        - path: /
          pathType: ImplementationSpecific
  tls: []
  #  - secretName: carbon-aware-sdk-tls
  #    hosts:
  #      - carbon-aware-sdk.local

resources: {}
  # limits:
  #   cpu: 100m
  #   memory: 128Mi
  # requests:
  #   cpu: 100m
  #   memory: 128Mi

autoscaling:
  enabled: false
  minReplicas: 1
  maxReplicas: 100
  targetCPUUtilizationPercentage: 80
  # targetMemoryUtilizationPercentage: 80

nodeSelector: {}

tolerations: []

affinity: {}

env: []

# appsettings.json
appsettings: |-
  {
    "DataSources": {
      "EmissionsDataSource": "ElectricityMaps",
      "ForecastDataSource": "WattTime",
      "Configurations": {
        "WattTime": {
          "Type": "WattTime",
          "Username": "username",
          "Password": "password",
          "BaseURL": "https://api2.watttime.org/v2/",
          "Proxy": {
            "useProxy": true,
            "url": "http://10.10.10.1",
            "username": "proxyUsername",
            "password": "proxyPassword"
          }
        },
        "ElectricityMaps": {
          "Type": "ElectricityMaps",
          "APITokenHeader": "auth-token",
          "APIToken": "myAwesomeToken",
          "BaseURL": "https://api.electricitymap.org/v3/"
        }
      }
    }
  }
The video in below is demonstration to install Carbon Aware SDK via Helm. Note that installing the SDK from local directory ( ~/github-forked/carbon-aware-sdk/helm-chart ), not an OCI container.
!Demonstration to intall Carbon Aware SDK from local with Helm
Usage
Calling the Web API via command line
Prerequisites:
curlor other tool that allows making HTTP requests (e.g.wget)- Recommended:
jqfor parsing JSON output: https://stedolan.github.io/jq/
With the API running on localhost:5073, we can make HTTP requests to its
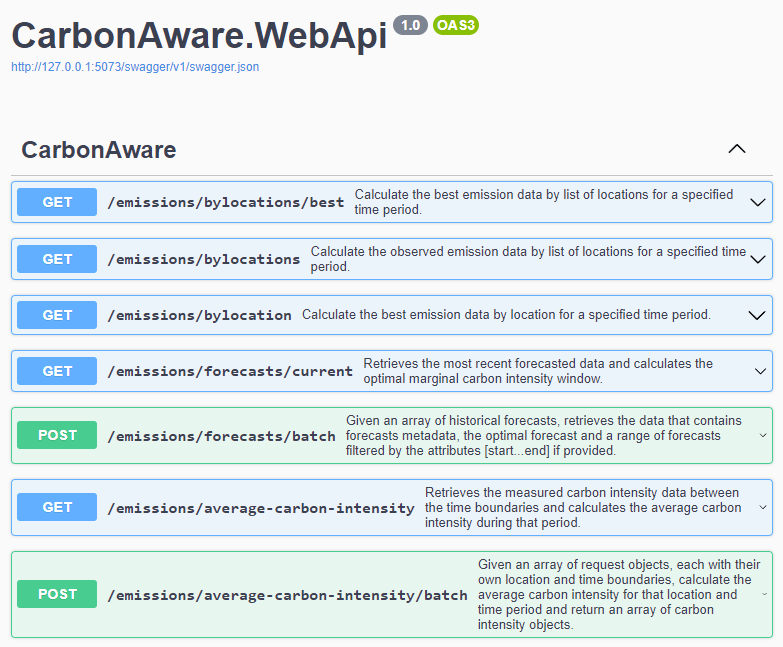
endpoints, full endpoint description can be found here
To get a list of all locations supported, you can use the Locations API endpoint
/locations referenced in
src/CarbonAware.WebApi/src/Controllers/LocationsController.cs.
Note that you have to configure LocationDataSourcesConfiguration
into appsettings.json before launching WebAPI, otherwise WebAPI returns
HTTP 204 (No Content).
Expected Output:
{
  "eastus": {
    "Latitude": 37.3719,
    "Longitude": -79.8164,
    "Name": "eastus"
  },
  ...
  "switzerlandnorth":{
    "Latitude": 47.451542,
    "Longitude": 8.564572,
    "Name": "switzerlandnorth"
  }
}
Calling the /emissions/bylocation endpoint
In console, we can run the below command, to request data for a single location in a particular timeframe:
curl "http://localhost:5073/emissions/bylocation?location=westus&time=2022-08-23T14%3A00&toTime=2022-08-23T14%3A30" | jq
Note that region names in this example (e.g. westus) are defined in
azure-regions.json.
AWS region is also available in aws-regions.json.
You can omit the | jq to get the JSON data raw and unparsed. This is a request
for data in the westus region from the date 2022-08-23 at 14:00 to
2022-08-23 at 14:30. (Note: semicolons : are encoded as %3A in URLs).
The sample data output should be:
[
  {
    "location": "CAISO_NORTH",
    "time": "2022-08-23T14:30:00+00:00",
    "rating": 439.07741416000005,
    "duration": "00:05:00"
  },
  {
    "location": "CAISO_NORTH",
    "time": "2022-08-23T14:25:00+00:00",
    "rating": 438.62382179,
    "duration": "00:05:00"
  },
  {
    "location": "CAISO_NORTH",
    "time": "2022-08-23T14:20:00+00:00",
    "rating": 438.62382179,
    "duration": "00:05:00"
  },
  {
    "location": "CAISO_NORTH",
    "time": "2022-08-23T14:15:00+00:00",
    "rating": 439.53100653,
    "duration": "00:05:00"
  },
  {
    "location": "CAISO_NORTH",
    "time": "2022-08-23T14:10:00+00:00",
    "rating": 439.98459890000004,
    "duration": "00:05:00"
  },
  {
    "location": "CAISO_NORTH",
    "time": "2022-08-23T14:05:00+00:00",
    "rating": 456.31392422000005,
    "duration": "00:05:00"
  },
  {
    "location": "CAISO_NORTH",
    "time": "2022-08-23T14:00:00+00:00",
    "rating": 439.98459890000004,
    "duration": "00:05:00"
  },
  {
    "location": "CAISO_NORTH",
    "time": "2022-08-23T13:55:00+00:00",
    "rating": 445.42770734000004,
    "duration": "00:05:00"
  }
]
Calling the Web API via client libraries
The SDK can work with libraries for up to 50 languages generated with the Open API Generator (Swagger). This guide will provide a tutorial to generating clients for java, Python, JavaScript, .NET and GoLang. There is also a walkthrough of an example Python script interacting with the SDK.
2.4 Configurations
This project uses the dotnet standard
Microsoft.Extensions.Configuration
mechanism, which allows the user to configure their environment variables in a
unified view while making use of different configuration sources. Review the
link to understand more about the IConfiguration type.
The WebAPI project uses standard configuration sources provided by ASPNetCore. Please review this link to understand how configuration is loaded and the priority of that configuration.
Please note that configuration is hierarchical. The last configuration source
loaded that contains a configuration value will be the value that's used. This
means that if the same configuration value is found in both appsettings.json
and as an environment variable, the value from the environment variable will be
the value that's applied.
See configuration.md for details about how to configure specific components of the application.
Environment variables
When adding values via environment variables, we recommend that you use the double underscore form, rather than the colon form. Colons won't work in non-windows environment. For example:
DataSources__EmissionsDataSource="WattTime"
Note that double underscores are used to represent dotted notation or child elements that you see in the JSON below. For example, to set proxy information using environment variables, you'd do this:
DataSources__Configurations__WattTime__UseProxy
Local project settings
For local-only settings you can use environment variables, the Secret Manager tool , or an untracked Development appsettings file to override the default project settings.
To use the settings file, rename a copy of the template called
appsettings.Development.json.template to appsettings.Development.json and
remove the first line of (invalid) comments. Then update any settings according
to your preferences.
Wherever possible, the projects leverage the default .NET configuration expectations. Thus, they can be configured using any file matching the format:
appsettings.<ENV>.json. Where<ENV>is the value of theASPNETCORE_ENVIRONMENTenvironment variable. By convention projects tend to use the provided HostEnvironment constantsDevelopment,Staging, andProduction.